When applying for an employment opportunity, one of the prerequisites is having a clean NBI. However, the notion of obtaining this required document used to put people in a foul mood, given the long lines suffering for a minimum of three hours to complete the registration form in the agency.
To improve this situation for people, the Philippine government has allowed registration for NBI clearance online. Thus, many citizens now need a detailed guide along the NBI Online. Let’s scroll down to learn the way.
Table of Contents
What Is NBI Clearance?
The National Bureau of Investigation is abbreviated as NBI. The clearance from the NBI is additionally necessary when applying for an employment opportunity in the Philippines or overseas), studying abroad, taking the civil service test, or starting a company.
The goal of the NBI clearance is to demonstrate that you are a law-abiding person who has never broken the law. Obtaining an NBI clearance proved to be extremely lengthy.
The good news is that things have changed for the better. NBI declared in 2015 that to obtain an NBI clearance. Everybody needs to apply and arrange meetings online.
This guide includes:
- The proper procedure for scheduling appointments.
- Paying the necessary NBI Fees.
- NBI renewals.
NBI Clearance Requirements In The Philippines
Scheduling a meeting is now simpler than ever via the NBI online registration system. However, candidates ought to arrange the prerequisites before planning their visit.
For initial contenders, particularly those seeking renewal but whose NBI certifications have been granted previous to 2014 or whose prior clearances had corrections/errors/changes in any area of expertise, the following information is necessary:
- Two genuine documents issued by the government, such as a passport, driver’s license, ID card, birth certificate, etc.
- Certification from the Barangay.
According to the First Time Individuals Seeking Employment Support Act, initial-time job applicants are qualified for a no-cost NBI Clearance. Everything they are required to submit is shown a Barangay Certificate, which confirms that they belong to the category of initial job applicant who has resided in their current location for a minimum of a half year.
The Step by Step To Create A NBI Clearance Online Account

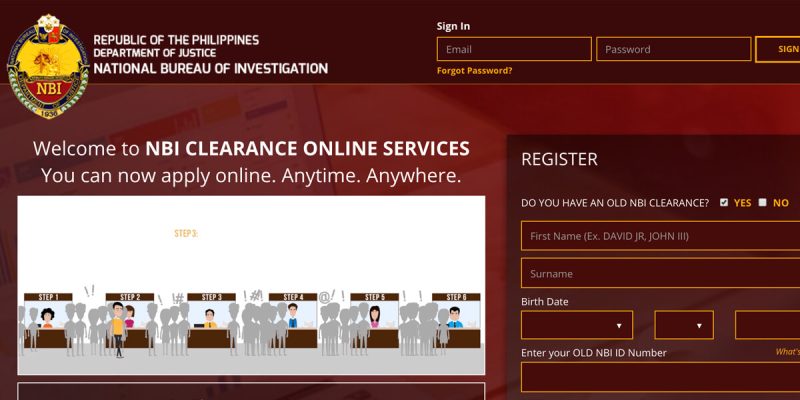
Step 1: Access the NBI clearance online official platform and create a user account.
If you’ve been identified as a new-time applicant for employment looking for free NBI clearance, continue with the application process by clicking the yellow box labeled “First Time Jobseekers.” If not, continue with the standard procedure for the following stages.

Step 2: Locate the NBI Online Registration area on the upper right edge of your monitor. See the line “Do you have an NBI clearance issued from 2014 to present?”. There is also a tick box for your reply. Just select “NO”.
Step 3: The customer account form for registering on the NBI application website will appear. Begin completing the enrollment needed information.
Please ensure that every personal data is entered accurately, as this information can not be changed afterward. After filling out the form, mark the “Read and accept terms of services” option. It will open a little pop-up window. Click the “AGREE” icon.
Step 4: You are next entitled to an SMS or email from the NBI containing a 6-digit temporary password. Fill in the OTP box.
Step 5: After you successfully input the OTP, the application will notify you that your sign-up was completed.
How To Get NBI Clearance Online In The Philippines

Log Into Your Account
Navigate to the NBI Clearance webpage via the following link: https://clearance.nbi.gov.ph/
You can access the account you created by entering the email address you provided when you registered and the password you chose.
After that, you must also choose more information about the type of identification you must bring to the in-person registration session.
Select Your Favorite NBI Location
You can choose the main office at any neighboring NBI. Fortunately, there are multiple outlets in Manila and nationwide, so you’ll never be short of options.
When you have already spent the cost and wish to conduct your NBI clearance at another location than the one you selected above, you must contact that particular branch and ask that the paperwork be moved to your new NBI clearance office. You cannot go to any location to complete the application form without a formal endorsement.
Set Up The Suitable Schedule
Immediately following selecting an NBI Branch, pick the desired time and date. For setting a scheduled date, click the blue box beneath your selected date.

The Meeting Agenda on the right-hand side of the display has been changed once you picked your NBI Office and the schedule.
Please be cautious when selecting the desired date since you can no longer amend or postpone it after paying the NBI clearing cost. If you have already paid but cannot attend your appointment, the NBI will offer you an additional 15 days to complete your registration at the NBI clearing branch of your choosing.
Pay The NBI Clearance Fee

You have been instructed to pay the NBI Clearance Fee. Select the GCash icon/logo among the payment method symbols provided.
The identical Payment Summary and Scheduling will be demonstrated. Pay attention to the information displayed. Select the “Proceed to Payment” option.
An NBI Online reference code will be assigned to you. Take a snapshot or note this number. The data provided is critical to the NBI clearance online form.
The total cost must be submitted (Php 155) is the last sum you must pay with your GCash app.
Provide your contact information, Amount, and electronic mail address. Enter the billing information, especially the NBI Clearance Reference No.
To pay for your NBI Online Fee, click the “Confirm” option. The GCash confirmation will be displayed if the transaction is accepted. Capture a photograph and save it on your phone.
Finally, that you have completed the transaction, your booking of our NBI Online Meeting is complete. The next step is to stay tuned for the schedule before heading to the NBI Office.
Take Your Photo And Fingerprint Biometrics
On the scheduled meeting day, go to your preferred NBI clearance center.
Remember to bring the prerequisites and the completed application form/reference code. You can expect to be assisted by a law enforcement officer or NBI employee.
After completing the application, proceed to the encoded location, where your fingerprints and photos will be captured.
The NBI employees request that you confirm that all of the private data on your NBI clearance document is correct. They will provide you with their computer monitor for easy verification.
This work is an opportunity to remedy any inaccuracies or erroneous information you discovered. Please notify them of this; they will happily adjust it for you.
Receive Your NBI Clearance

The NBI Staff directs you to the Releasing area. Hold out for your given name to be announced in the Releasing zone.
The NBI personnel provide you with the documented NBI clearance. You are allowed to depart.
In rare cases, the staff may request that you return after ten days. Simply put, the team is holding the NBI Clearance pending issue since neither you nor the surname have a criminal or unfavorable record.
If you don’t have a criminal record, then you will get your NBI clearance.
The Guide To Renew NBI Clearance Online In The Philippines

Step 1: Navigate to the Clearance Quick Renewal page.
Step 2: Enter all required information, including your former NBI ID number.
Step 3: Choose an NBI branch.
Step 4: You will be given a Reference Code that you could use to pay at any one of the stores or selected partners.
Step 5: Determine the extent to which your preference is pick-up or delivery. Afterward, keep going.
Step 6: After selecting delivery from doorstep to doorstep and clicking Continue, you will be prompted to bring it to DeliveryBox.
DeliveryBox’s shipping service is now accessible across the NCR and beyond, with transportation prices varying between PHP 200 and PHP 350. Transactions of any kind are non-exchangeable once the money has been processed.
The NBI estimates that it will take 5 to 10 days of work to send out your NBI Clearance. If you need it urgently, you can also choose a quick NBI service, but it will be a bit more expensive than usual.
Conclusion
This blog has provided detailed instructions for readers on the information they need about NBI clearance online. This online registration form has brought difficulty for first-time users.
However, when used well, registering for NBI clearance online is becoming more convenient, time-saving, and easier than ever. Follow the simple steps there so you can register yourself for NBI Online.
